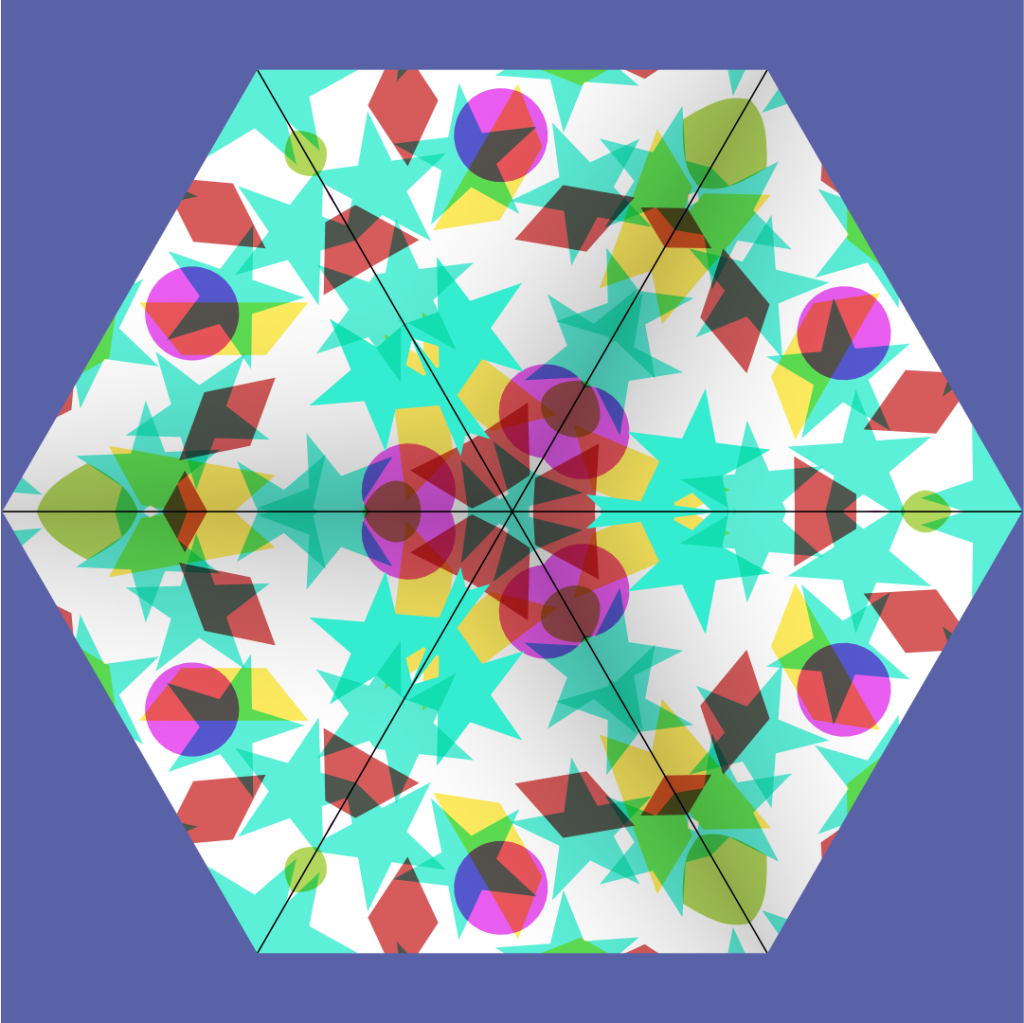
We recently had a challenge to use symbols to make something using rotational symmetry. This is how I simulated the view inside a kaleidoscope like we used to have as kids in the 1970s.
Overview
- Make an equilateral triangle as a clipping mask to fill with the coloured shapes that will form the pattern.
- Make the clipping mask shape into a Symbol so that each copy of the symbol will be automatically updated when any changes are made to one of them.
- Duplicate the symbol twice and rotate the duplicates by 120 degrees and -120 degrees respectively.
- Duplicate the original symbol once again and flip it horizontally to make it a mirror image. This is needed to make the kaleidoscope image convincing since it works using mirrors inside. Duplicate and rotate the flipped symbol twice as above to make the missing three triangles and rotate them together into place to complate the hexagon.
- That is the kaleidoscope template set up. Now you can add anything inside any one of the symbol clipper triangles and it will appear in all of the six triangles making up the hexagon in perfect symmertry and mirror reflection.
More detail on each step is provided below.

Clipping mask
We want the resulting image to be a hexagon made up of six equilateral triangles.
In order to make an equilateral triangle (all sides the same length), we use the Polygon tool (not the Triangle tool!). Hold SHIFT down at the same time as dragging the mouse. A pentagon appears. Change the number of sides from 5 to 3 and the job is done.
This shape is the “clipping mask” that will limit the area in which the shapes added are allowed to be seen. I added a gradient fill to this triangle to make it look a bit less vetor graphics and a bit more like looking into a mirror in a kaleidoscope.

I dropped some shapes in and coloured them to look like suitable bits of transparent plastic. I used stars, diamonds, circle, trapeziums and hearts; all standard shapes provided by Affinity Designer. Having filled them with colour, I set all their opacities to 80% and their blend modes to Multiply (combines the colours where they overlap and makes them darker, which looks like overlapping translucent plastic shapes.)
As well as the triangular clipping mask within each symbol, at the end of this article, I also put all the symbols within the a hexagonal clipping mask to allow some blue background to show behind.
Symbols and rotation
Next the triangle clipping mask is made into a Symbol by ensuring Symbols is checked (ticked) in the Windows menu and then clicking Create on the Symbols window when the triangle is selected in the Layers stack. Now we have a symbol and it appear in the Symbol window.
Now, before we duplicate and rotate, we need to make sure we have the symbol selected and not the Triangle is contains. We need to ensure that the Symbol centre of rotation is the top of the triangle rather than the default centre of the triangle. Enable Transform Origin and drag the origin to the top of the triangle. If snapping is on, it will be easy to drop it in exactly the right place.
Right-click the symbol layer and select Duplicate. With the duplicate selected, look at the Transform panel and type 360/3 in the “R” box. R is for rotation. When you hit return, the duplicate will rotate to exactly the right place. If you then type CTRL-J, the second duplicate should appear in the correct place.
So now we have half of the kaleidoscope done:

Mirror the other half
We need to complete the other half but with mirrored symbols containing triangle clipping masks:
- Select the original symbol and duplicate as before.
- Flip the duplicate horizontally to make it the mirror image of the original.
- Now duplicate and rotate the mirror symbol two more times as before.
- Select all three and rotate them into place by clicking on their rotation handle and dragging. Holding down shift will ensure the rotation happens in useful jumps and makes it easy to get right.

Now have fun
Group the shapes within the Triangle clipping maks within any one of the symbols. This will cause them to be grouped in all the other symbols. With the group selected, slide them around until you get a result you like in the kaleidoscope. Here are some of mine:


I put all the symbols inside another clipping mask, this time a hexagon. And I added a coloured background to the Artboard.
Leave a comment